
Table of Contents
- How to Store Diamond Painting Kits: Best Practices for Unfinished Projects
- Best Diamond Painting Storage Containers and Boxes
- Organizing Diamond Painting Supplies and Drill Storage
- How to Store Finished Diamond Paintings Without Damage
- How to Keep Diamond Painting Dust-Free and Protected Long-Term
- Workspace Organization and Inventory Tracking for Diamond Art Projects
- Common Mistakes to Avoid When Storing Diamond Painting Kits
- Conclusion
How to Store Diamond Painting Kits: A Complete Guide
Last Updated: July 27, 2026
Learning how to store diamond painting kits properly is the difference between preserving your creative work and watching it deteriorate in a closet. At Jeanne Argent Atelier, we understand that diamond painting requires the same care as traditional fine art, your finished pieces deserve protection, and your unfinished projects need organization to stay accessible and intact. This guide covers everything from choosing the right storage containers to protecting your canvas adhesive and preserving finished paintings for years to come.
How to Store Diamond Painting Kits: Best Practices for Unfinished Projects
The moment you open a diamond painting kit, your canvas's adhesive begins degrading, drills can scatter, and the entire project becomes vulnerable to dust and damage. Proper storage means containing all components in one place while protecting the canvas from exposure.
Keep your kit in its original packaging if intact, but once you've begun working, transfer your project to a dedicated storage container with compartments or dividers. This prevents the canvas from rolling or folding, which cracks diamonds and damages adhesive.
Store the canvas flat whenever possible rather than rolling it. If you must roll it, do so with the diamond side facing outward, never fold the adhesive side inward. Place acid-free tissue paper between layers if stacking multiple canvases. Keep the canvas away from direct sunlight, which fades the printed design and weakens adhesive.
Your drills need to stay organized and separated by color. Use small compartmented containers or tackle boxes with adjustable dividers. Label each compartment clearly so you can find the right color without dumping out dozens of containers. Keep the drill pen and applicator tool with your kit in a small ziplock bag or pencil case so they don't get lost.
Best Diamond Painting Storage Containers and Boxes
The right container protects your canvas, keeps drills organized, and fits your available space. Stackable containers maximize vertical storage without consuming floor space.
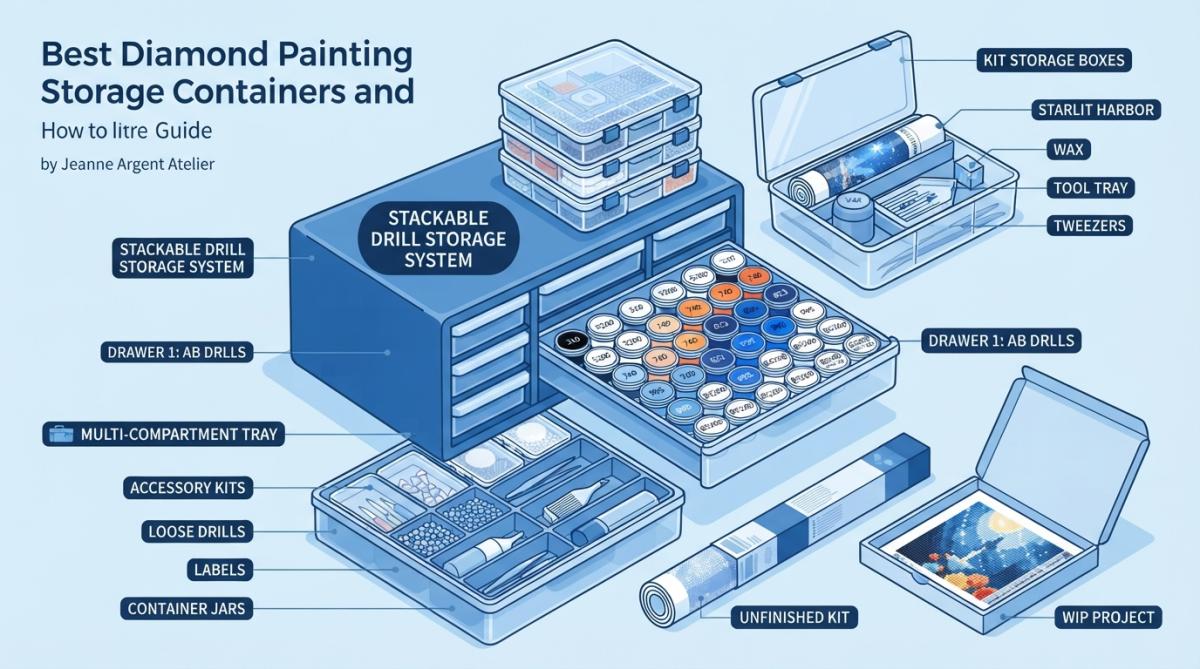
Clear plastic storage boxes are the gold standard for diamond painting kits. You can see contents at a glance, saving time when searching for a specific project or color. Look for boxes with removable dividers so you can customize the layout. A3-size containers work well for most diamond painting canvases.
Compartmented organizers with adjustable dividers offer flexibility that fixed-section boxes cannot match. These work especially well if you're storing multiple projects simultaneously. The drawback is that they consume more horizontal space, so they work best in craft rooms rather than under-bed storage.
Rolling carts with multiple tiers provide excellent access and mobility. If your craft room is in one location but you prefer to work elsewhere, a rolling cart lets you move your entire collection without effort. Ensure the cart's tier height accommodates your storage containers and that wheels lock firmly.
Flat file cabinets work exceptionally well for finished diamond paintings and unfinished projects. The shallow drawers prevent stacking, keeping canvases flat and protected. However, they're expensive and consume significant floor space, making them practical only for serious collectors.
Under-bed storage containers are practical for limited closet space. Choose containers with wheels so you can slide them easily. Ensure the container has a tight-fitting lid to keep dust out. Monitor your projects periodically for signs of adhesive degradation, as under-bed storage often experiences temperature fluctuations.
Organizing Diamond Painting Supplies and Drill Storage
Drill organization determines how quickly you can find colors during work sessions. Sort drills by color family first: reds, blues, greens, neutrals, and metallics. Within each family, arrange from light to dark. Use small bead containers or compartmented boxes to store each color.
Label every container with the color name and a swatch of the actual drill color. Use waterproof labels and permanent marker so the label doesn't fade or peel. Include the drill type if mixing round and square drills, preventing accidentally grabbing the wrong shape mid-project.
For projects using a limited drill palette, create project-specific drill kits by transferring only needed colors into a smaller organizer. This reduces search time and prevents frustration.
Create a simple spreadsheet listing each project, its status (unfinished or completed), the colors it uses, and the storage location. Update it whenever you start or complete a project. This prevents buying duplicate drills and helps you identify which projects need attention.
How to Store Finished Diamond Paintings Without Damage
Once you've completed a diamond painting, preservation begins. Your finished piece is now permanent artwork that deserves the same care you'd give a framed painting or photograph.
The critical decision is flat storage versus rolling. Flat storage is superior for long-term preservation because it prevents stress on the adhesive and keeps diamonds in perfect alignment. Rolling is acceptable for short-term storage only if done correctly.
Flat storage works best in a portfolio or storage book designed for artwork. Stack finished paintings horizontally with protective sleeves between each piece. Never stack more than five paintings in one stack, as weight compresses diamonds and stresses adhesive.
If you must roll your finished painting, always roll it with the diamond side facing outward. Use acid-free tissue paper as a protective layer between the canvas and rolling core. Wrap the rolled painting in kraft paper or acid-free tissue to keep dust out. Store the roll horizontally rather than upright.
Protective sleeves are essential for finished paintings. Archival-quality sleeves made from acid-free, lignin-free materials prevent yellowing and deterioration. For paintings you plan to display, use UV-protective sleeves that reduce fading from sunlight exposure.
How to Keep Diamond Painting Dust-Free and Protected Long-Term
Dust settles on the surface, obscures the diamonds' sparkle, and can scratch the finish when you try to clean it. Long-term storage requires creating a dust-free environment and maintaining consistent conditions.
Store finished paintings in sealed containers or portfolio cases. Clear plastic storage boxes with tight-fitting lids work well, but ensure the box is clean before placing your painting inside. Avoid cardboard boxes, which deteriorate over time and release particles.
Climate control is critical for long-term preservation. Ideally, store paintings in a room with temperature between 65-75°F and humidity between 30-50%. Basements experience humidity fluctuations that damage adhesive and can cause mold growth. Attics experience extreme temperature swings that stress adhesive. A climate-controlled closet or interior room is far superior.
Use acid-free materials exclusively, cardboard, tissue, and boxes all matter. Avoid plastic wrap or standard plastic bags, which trap moisture and can cause mold. Instead, use acid-free tissue paper and breathable storage containers.
Check stored paintings periodically. Open the container every six months and inspect for signs of mold, adhesive failure, or diamond loss. Mold requires immediate attention, move the painting to a dry environment and consider professional conservation.
Avoid storing finished paintings in direct sunlight. UV rays fade the printed canvas design and can weaken adhesive over time. If displaying a finished painting, use UV-protective glass or place it in a location that receives indirect light only.
Workspace Organization and Inventory Tracking for Diamond Art Projects
An organized workspace dramatically improves your ability to work on multiple projects simultaneously. Set up your craft room with zones: a work zone where you apply diamonds, a storage zone for finished and unfinished projects, and an organization zone for drills and supplies.
Lighting is essential and often overlooked. Poor lighting makes it difficult to see colors accurately and strains your eyes. Use a combination of overhead lighting and a focused task light positioned to illuminate your canvas without creating shadows. Daylight-balanced LED lights accurately represent true colors.
Create an inventory spreadsheet tracking all your projects, their status, the colors they use, and their storage location. Include the kit's original source, canvas size, and any notes about difficulty or special requirements. Update the spreadsheet whenever you start or complete a project.
Label your containers with the project name, the colors they contain, and the date you started. Use consistent labeling across all containers so your system is intuitive. Include a color swatch on each label to prevent confusion when lighting conditions vary.
Budget-friendly DIY storage solutions work surprisingly well. Repurpose old filing cabinets for flat storage of finished paintings. Use mason jars with screw-on lids for drill storage, they're inexpensive, stackable, and transparent. The key is consistency: whatever system you choose, apply it uniformly across all your storage.
Common Mistakes to Avoid When Storing Diamond Painting Kits
Understanding what not to do prevents costly damage to your projects. Storing unfinished kits in rolled position is the most common mistake. Rolling compresses diamonds, stresses adhesive, and can cause permanent creases in the canvas. Always store unfinished kits flat or in a standing position with the canvas supported.
Mixing different colors of drills into single containers destroys your organizational system. Once colors are mixed, separating them again is nearly impossible. Commit to compartmented storage and individual labeling from the beginning.
Storing paintings in basements or attics exposes them to temperature and humidity fluctuations. Basements accumulate moisture, promoting mold growth and adhesive failure. Attics experience extreme heat in summer and cold in winter, stressing the canvas and diamonds. These environments are acceptable only for very short-term storage.
Using standard plastic bags or plastic wrap for long-term storage traps moisture and promotes mold. Use acid-free tissue paper and breathable storage containers instead. Stacking too many paintings in one stack crushes the bottom pieces. Stack no more than five paintings, placing protective sleeves between each piece.
Exposing finished paintings to direct sunlight causes fading and adhesive degradation. Even indirect sunlight over months can noticeably fade the printed canvas design. Store paintings in a dark location or use UV-protective display cases if you want to display them.
Failing to label containers leads to lost projects and wasted time. Label everything clearly, including the date you started the project. Include a color swatch on drill labels so you can identify colors at a glance.
Proper storage transforms diamond painting from a temporary hobby into a sustainable creative practice. Your finished pieces deserve preservation, and your unfinished projects deserve organization that makes resuming work a pleasure rather than a chore. Jeanne Argent Atelier's premium full-drill kits are designed for serious artists who complete their projects and want to preserve them beautifully. The high-quality canvas and specialized drill pens we include mean your paintings will maintain their integrity for years when stored correctly. Start with a simple flat storage system for unfinished work and acid-free portfolio storage for finished paintings, these fundamentals protect your investment and keep your creative momentum strong.
Frequently Asked Questions
What's the best way to store diamond painting drills to prevent them from spilling?
Use small bead containers with secure lids or compartmentalized organizers designed for diamond drills. Label each container by color or kit number for easy identification. Store containers in a stable location away from high traffic areas. For extra protection, place smaller containers inside larger stackable boxes to prevent accidental tipping. Keep containers in a cool, dry area where they won't shift during storage.
How do you store unfinished diamond painting kits without damaging the canvas or adhesive?
Keep unfinished kits in their original packaging or transfer them to airtight containers with compartments for the canvas, drills, and tools. Store the canvas flat to prevent creasing, and ensure the adhesive layer remains protected from dust and humidity. Keep the sealant and any included tools in separate compartments. Store in a cool, dry location away from direct sunlight. Label each container with the kit name and completion percentage for quick reference.
Should finished diamond paintings be stored flat or rolled for long-term preservation?
Flat storage is the better choice for long-term preservation of finished diamond paintings. Store completed projects flat in protective sleeves or portfolios to prevent pressure on the resin diamonds and canvas. If space is limited, rolling is acceptable for short-term storage, but use acid-free tissue paper and ensure the roll is loose to avoid permanent creasing. For archival storage, flat filing in climate-controlled conditions with protective sleeves offers the best protection against dust and damage.
What containers work best for organizing diamond painting supplies in a craft room?
Clear stackable storage containers with multiple compartments are ideal for organizing diamond painting supplies. Choose boxes sized for your workspace, A3 size containers fit standard kits well. Look for dust-proof options with secure lids to protect drills and canvases. Label each container clearly for quick inventory tracking. Under-bed storage boxes work well for finished projects and backup supplies. Drawer organizers with adjustable dividers are excellent for storing drill pens, trays, and small accessories in your workspace.
This article was written using GrandRanker